
Update : LINK UPDATED
Dear Friends Asslam o Alaikum!!!
Aap sab ko maaloom ho ga k Pakistan main aaj kal Qmobile ka bohat naam chal raha hay, khaas tor per is ki Noir series. Noir series Android OS per base karti hay or jaisa k aap nay suna ho ga k Android OS ko "ROOT" kar liya jaata hay taakay isay apnay lehaz say change kar sakain. Thora sa rooting k baaray batata chaloun k rooting jo hay woh aap samjhayn k set ki original settings ko hack kar k bypass karnay ko kehtay hayn jis ka result ye hota hay k aap set main bohat si changes la saktay hayn.
Aaj main aap ko Qmobile k kuch sets jin main Noir A5Classic, A6, A8, A10 or A12 shamil hayn, un ko root karnay ka aik bohat hi simple method bataon ga jis ki madad say aap apnay phone ko root kar sakain gay.
Warning: Main in methods ko test kar chuka houn, Magar phir bhi aap ko yaad dilaata chaloun k set ko root karnay say aap k set ki warranty void ho jaye gi or agar rooting method ghalat follow karnay say aap k set ko nuksaan pohancha to main is ka zimaydaar nahi houn ga. Aap khud apnay behalf pe apna set root kijiye.
Bismillah perh lijiye...;-)
Aap ko chahye kya ho ga???
1. Apna phone set (A5classic, A6, A8, A10 or A12...in main say jo bhi ho)
2. USB Data Cable
5. Aik adad chunna munna sa Damagh :D
Rooting Method
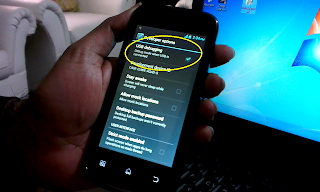
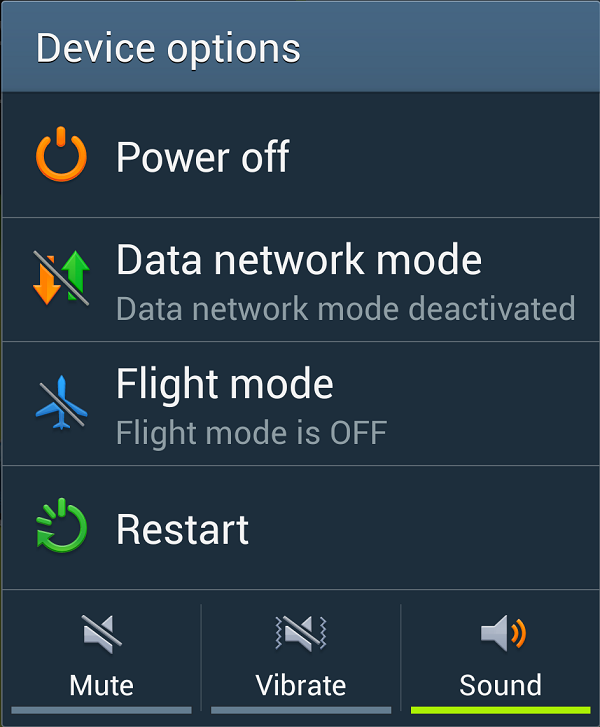
1. Sab say pehlay apnay phones ki settings main jayen or wahan per developer options main jayen. Wahan per aap ko "USB DEBUGGING" ki option dikhaye day gi. Usay tick karain, jis tarah neechay diye gaye screenshot main dikhaya gya hay.


Allah Hafiz
Dear Friends Asslam o Alaikum!!!
Aap sab ko maaloom ho ga k Pakistan main aaj kal Qmobile ka bohat naam chal raha hay, khaas tor per is ki Noir series. Noir series Android OS per base karti hay or jaisa k aap nay suna ho ga k Android OS ko "ROOT" kar liya jaata hay taakay isay apnay lehaz say change kar sakain. Thora sa rooting k baaray batata chaloun k rooting jo hay woh aap samjhayn k set ki original settings ko hack kar k bypass karnay ko kehtay hayn jis ka result ye hota hay k aap set main bohat si changes la saktay hayn.
Aaj main aap ko Qmobile k kuch sets jin main Noir A5Classic, A6, A8, A10 or A12 shamil hayn, un ko root karnay ka aik bohat hi simple method bataon ga jis ki madad say aap apnay phone ko root kar sakain gay.
Warning: Main in methods ko test kar chuka houn, Magar phir bhi aap ko yaad dilaata chaloun k set ko root karnay say aap k set ki warranty void ho jaye gi or agar rooting method ghalat follow karnay say aap k set ko nuksaan pohancha to main is ka zimaydaar nahi houn ga. Aap khud apnay behalf pe apna set root kijiye.
Bismillah perh lijiye...;-)
Aap ko chahye kya ho ga???
1. Apna phone set (A5classic, A6, A8, A10 or A12...in main say jo bhi ho)
2. USB Data Cable
3. Noir Root Kit (Download HARE)4. Laptop/PC ...jis main koshish karain k power band na ho
5. Aik adad chunna munna sa Damagh :D
Rooting Method
1. Sab say pehlay apnay phones ki settings main jayen or wahan per developer options main jayen. Wahan per aap ko "USB DEBUGGING" ki option dikhaye day gi. Usay tick karain, jis tarah neechay diye gaye screenshot main dikhaya gya hay.
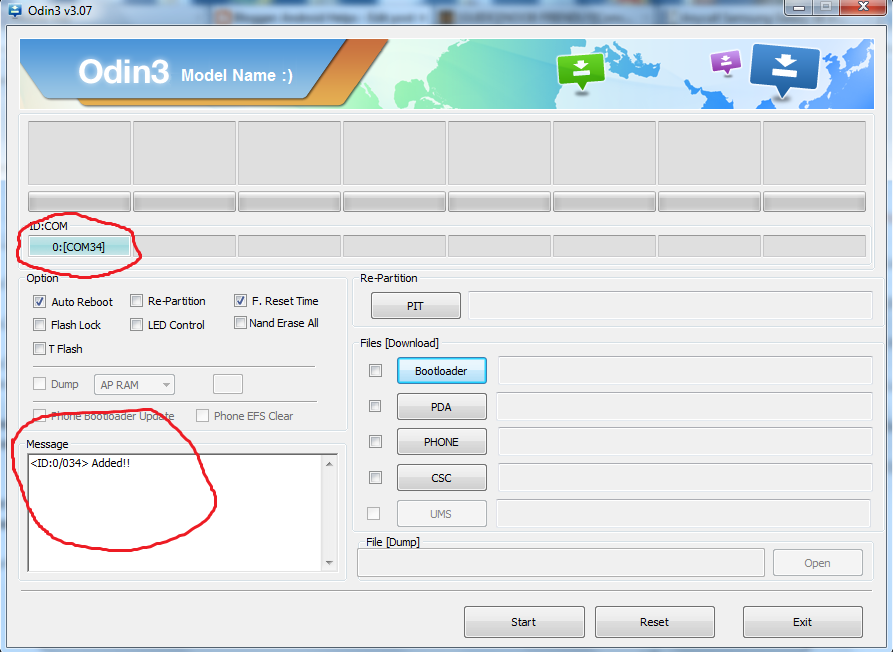
2. Ab aap apnay phone ko USB cable ki madad say Laptop/PC say connect
karain. Aap ki system aap ko message day ga k aap k phone k drivers
install nahi huay. Yahan per pareshan honay ki zaroorat nahi hay. Hosla
rakhayn...
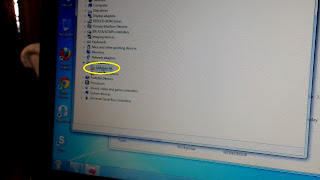
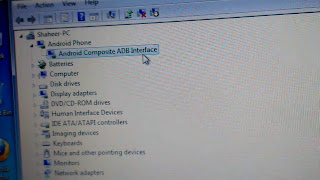
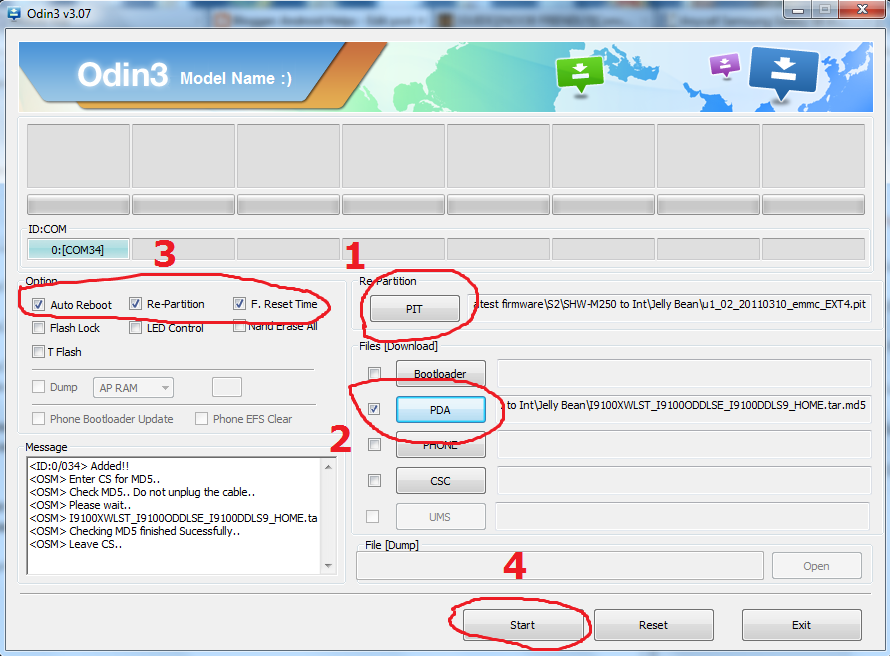
3. Phone connect karnay k baad "My Computer" per right click karain or
properties main jayen. Properties main ja kar Device Manager open
karain. Yahan per aap dekhain gay k aap k phone ka model aa raha ho ga
or is k saath aik Yellow color kar sign ho ga...screenshot main jaisay
aap dekh saktay hayn.
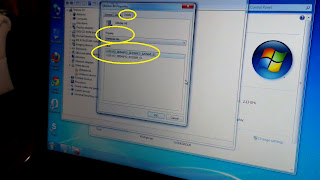
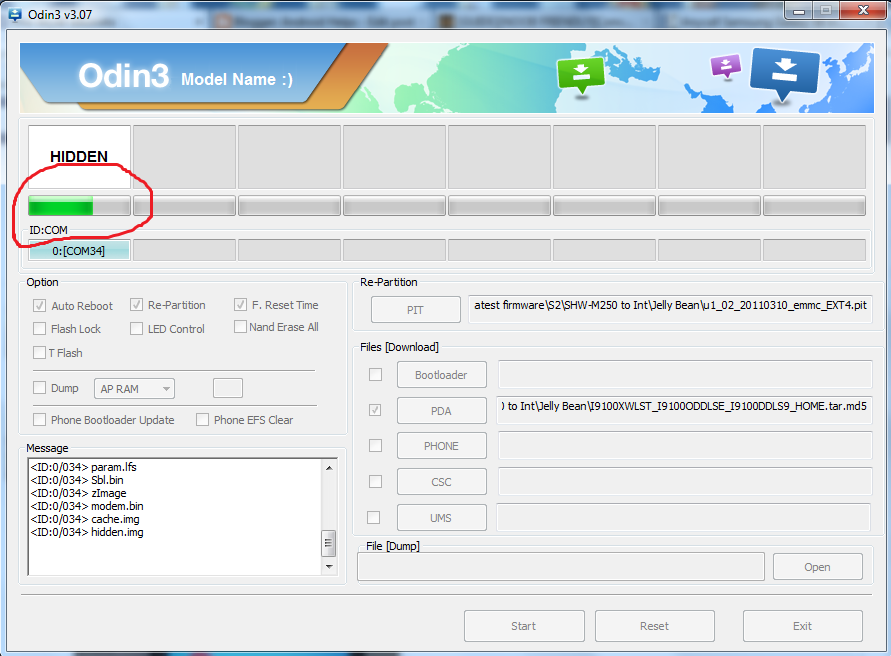
4. Aap apnay phone k naam per right click kijiye or properties main
jayen. Aik box open ho ga. Box main shuru main teen buttons houn gay.
Aap wahan "Details" per click karain or neechay property k section main
"Hardware Ids" select karain. Neechay values k section pe kuch values aa
jayen gin jaisay k neechay screen shot main aap ko nazr aa raha hay.
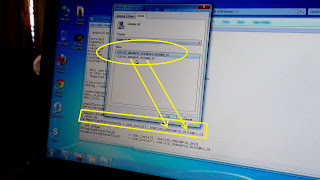
5. Aap nay shuru main Noir Root Kit download ki thi ZIP folder ki shakal
main. Usay aap desktop per extract kar layn. Root kit ko open karain
gay to aap ko 2 folders nazr aayen gay. Wahan pe aap "Noir USB ADB
Drivers" k folder ko open karain. Is folder main aap ko "android_winusb"
k naam say aik file nazr aaye gi. Is ko open karain gay to ye notepad
main open ho jaye gi. Note pad main aap nay ye lines dhoondni hayn
jaisay k screen shot main dikhaya gya hay or jo uper values thin pichlay
step main wo aap nay yahan enter karni hayn...screen shot mulahiza
farmain.
6. Aap nay sirf VID_ or PID_ values enter karni hay or kisi cheese ko
change nahi karna, changes karnay k baad file ko save kar layn or close
kar dayn. Agar pehlay say file main wohi values entered hayn jo Hardware
IDs main dikha raha hay to baghair kuch change kiye file as it is close
kar dayn.
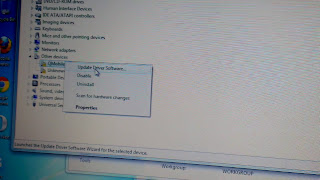
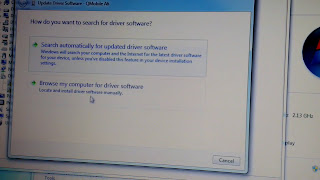
7. Ab aap dobara Device Manager main ja kar Apnay phone k uper right
click karain or "Update Driver Software" per click karain. Aik box open
ho ga wahan per aap nay click karna hay "Browse My Computer for Driver
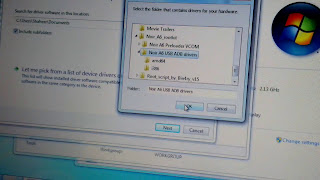
Software". Ab aap browse button per click karain or Noir Root Kit k
folder per click karain jo aap nay extract kiya tha. Noir Root Kit per
click karain gay to neechay Noir USB ADB Drivers ko select kar k OK daba
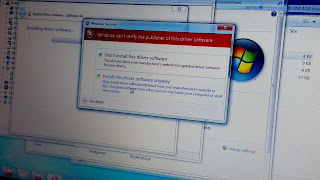
dijiye. Aagay k kuch steps k screenshots neechay mention kiye gaye
hayn. In ko ghor say dekh kar follow karain hata k last screen shot
complete na ho jaye.
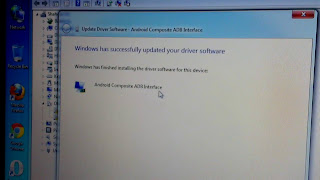
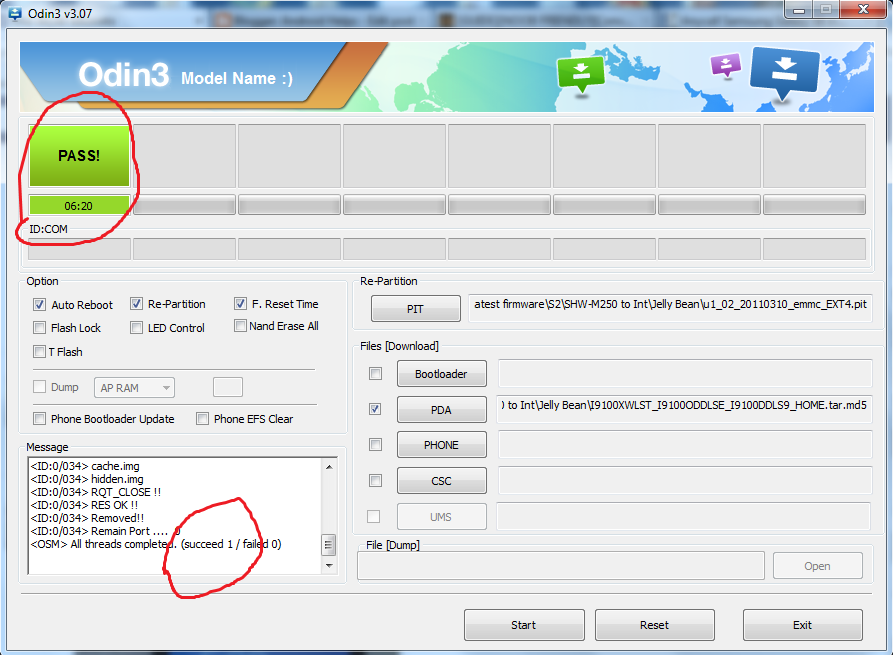
8. Jab last screen shot per likha aa jaye k
Windows has finished installing the driver software for this device :
Android Composite ADB Interface
To aap finish per click karain or apni device manager ki list main
dekhain gay to aap k phone ka naam jo k Qmobile aa raha tha with Yellow
sign ab change ho gya hay into " Android Composite ADB Interface". is
step k complete honay per aap ka 80% kaam complete ho gya hay. Screen
shot main confirm kar lijiye.
9. Jab Android Composite ADB Interface aa jaye to device manager ko
close kar dayn or ab Noir Root Kit ka folder open kijiye from desktop or
wahan per "Root_script_by_Bin4ry_v15" k folder ko open karain. Yahan is
moka per aap XDA developer jin ka nick name "Bin4ry" hay un ka shukria
ada karain jinhoun nay ye script compile kiya.
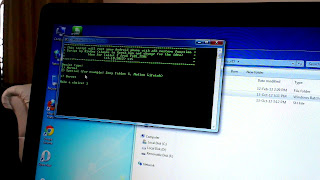
"Root_script_by_Bin4ry_v15" k folder ko open karain gay to aap k saamnay
3 cheesain aayen gin jis main "Stuff"..."RunMe" or "RunMe.sh" shaamil
hayn. Yahan per aap "RunMe" per double click karain gay to aik black or
green color ki windows saamnay aa jaye gi. Wahan per aik jaga "Make a
choice" likha ho ga...wahan pe aap "1" likh kar enter press karain gay.
Screen Shot neechay dekhiye.
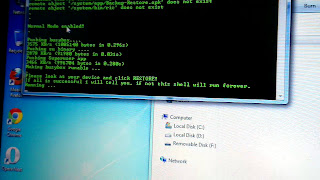
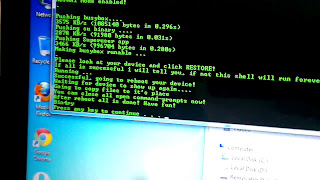
10. Enter press karnay k baad aap k screen per aik script automatically run ho ga or aik jaga likha aaye ga
"Please look at your device and click Restore"
"If all is successful i will tell you, if not this shell will run forever."
"Running..."
yahan per aap apnay phone ki screens per dekhain to kuch is tarah say
likha aa raha ho ga jaisay k neechay diye gaye screen shot per hay.
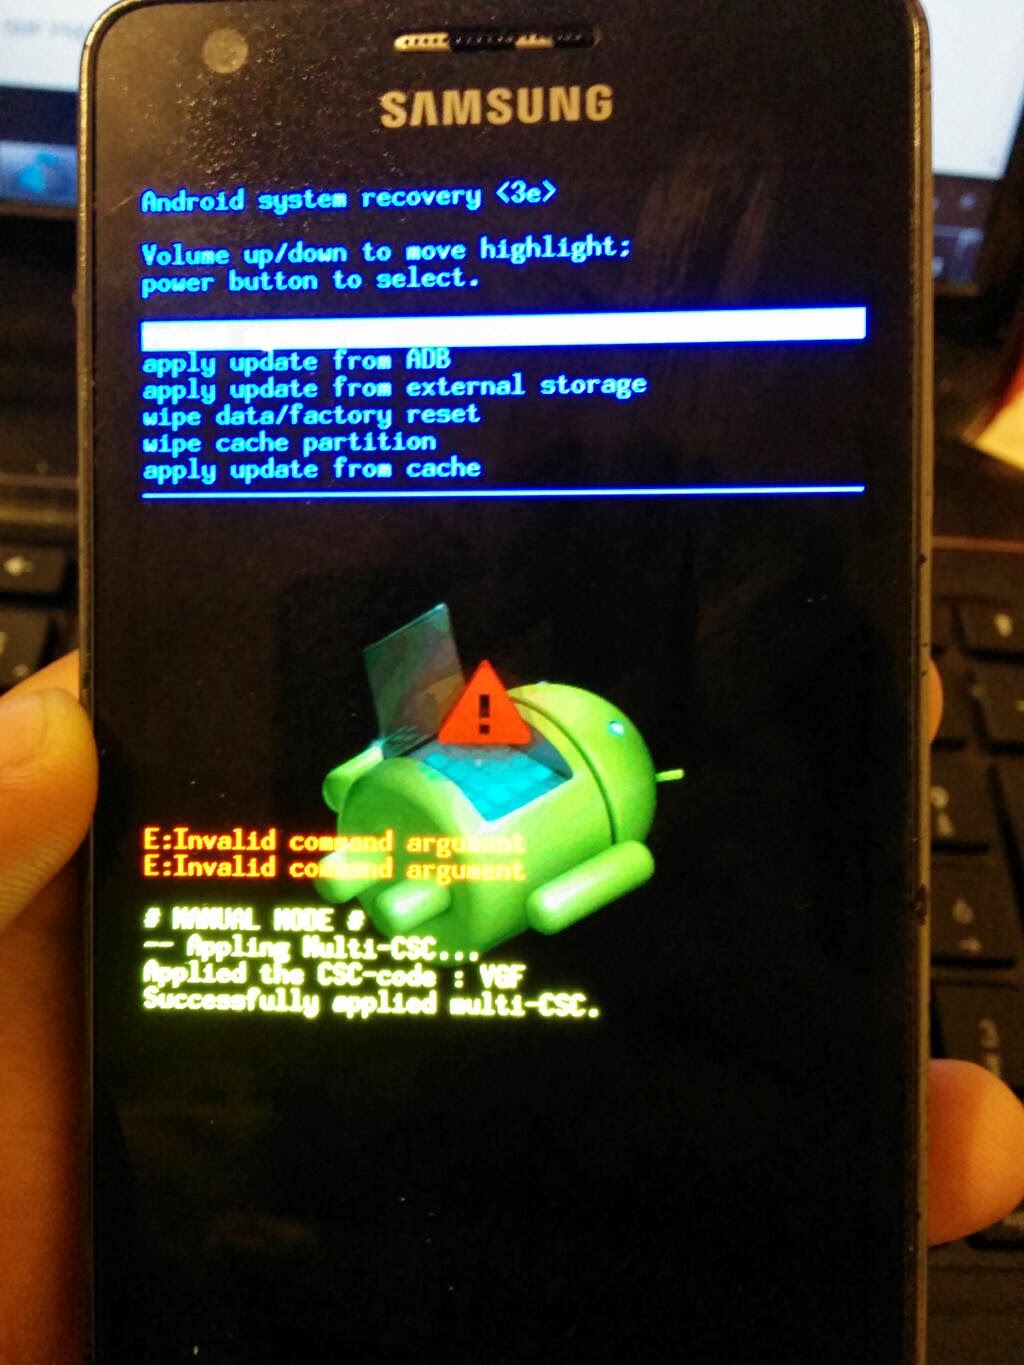
Yahan per aap nay sirf "Restore my data" ka button press karna hay or
aap ka phone automatically restart ho ga. Ab is mokay per aap k computer
per mukhtalif message aa rahay houn ga k drivers installed nahi, un sab
messages ko ignore kijiye. Is k ilawa aap ka phone bhi on ho kar phir
restart ho raha ho ga, is sab ko honay dijiye or heart fail honay ki
bilkul bhi zaroorat nahi kyun k ye bilkul normal kaam ho raha hay bas is
baat ka khaas khyaal rakhayn k is doraan usb cable phone ya pc say
disconnect na ho or PC ya Laptop band na hoo. Bil aakhir aik waqt main
aap ko message day ga "After reboot all is done!Have Fun" yahan per aap
koi bhi key press karain gay or program khud hi band ho jaye ga. Ab aap
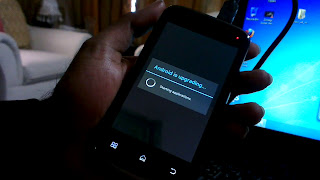
nay sirf set k dobara restart honay ka wait karna hay. Set k restart
honay per aik screen aaye gi. "Android is upgrading". Jab ye screen aa
jaye or phone on ho jaye to aap apnay menu main jayen or wahan per
"SuperSU" naam ki app dhoondain. Agar aap ko ye app nazr aati hay...to
aap ko mubarak ho...aap k set successfully root ho gya hay. In sab
cheesoun k step by step screenshots neechay mulahiza farmain.
So meray pyaaray bhaio...umeed hay k aap is method say apnay qmobile
phone ko root karnay main kamyaab ho jayen gay. Agar aap ko ye method
pasand aaya ho to hamari website k is link ko apnay dostoun main bhi
share karain takay or log bhi is say mustafeed houn.
Special thanks to : sheraz naseem
Allah Hafiz


